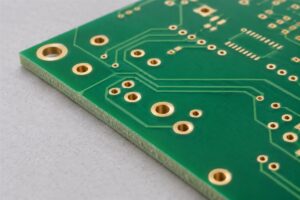
What an Evaluation Board Proves and What It Does Not

Use an evaluation board to test whether a component or subsystem can meet your needs. Move to a custom PCB when the remaining questions depend on your product’s size, power system, connectors, environment or manufacturing process. A working demonstration is useful evidence, but it is not a finished-product qualification.
An evaluation board is a ready-built platform that makes a device easier to power, configure and measure. A custom PCB places the required circuit in your own physical and electrical design. The distinction is not that one is professional and the other is not: they answer different questions.
Also check the exact supplier’s intended-use terms. TI’s standard EVM terms restrict its covered evaluation modules to development use and prohibit incorporating them into finished products. Do not assume that a board sold online is approved for production integration. Other products, particularly production modules, may have different terms.
| Result from the kit | What it supports | What still needs product-level evidence |
|---|---|---|
| Software communicates with the device | Basic interface and driver feasibility | Your power-up sequence, reset behavior, wiring and firmware configuration |
| Measured analog performance is acceptable | The tested device and setup can achieve that result | Your layout, sensor wiring, power noise and enclosure conditions |
| The supply powers the intended load | Feasibility under the tested load and cooling | Your input range, transient loads, thermal path and protection |
| A demonstration runs for several hours | That demonstration’s observed behavior | Defined reliability, environmental and production acceptance requirements |
Record the board revision, jumper settings, supply, load, firmware and measurement setup with each result. Without those details, comparing the custom prototype with the evaluation result becomes guesswork.
When to Stay with the Kit, Use a Module or Design a Board
Choose the next hardware form according to the question you still need to answer. You do not have to jump directly from a large evaluation kit to a fully integrated chip-level design.
| Option | Useful when | Decision boundary |
|---|---|---|
| Continue evaluation | Component choice, algorithms or basic performance remain uncertain | Do not spend on a product layout before resolving the uncertainty that could change the circuit |
| Production module plus custom carrier | A documented module handles a complex subsystem while you need custom connections and mechanics | Verify module integration requirements, permitted use, supply plans and total installed cost |
| Chip-level custom PCB | Size, power, interfaces or quantity justify owning the full implementation | Budget for layout, bring-up, testing and future changes, not only board fabrication |
For a concrete module example, Raspberry Pi’s Compute Module documentation describes using a custom carrier for production with the connectors required by the application. That option retains a module while customizing the surrounding board. It does not remove the need to validate the complete product.
Example: a sensor concept may need a week of algorithm experiments before the processor choice is stable. The evaluation kit is still useful. Once that choice is settled, a battery-powered version may need a different regulator, fewer connectors and a much smaller enclosure. Those questions require representative custom hardware, even if the algorithm already works.
Do not choose a custom board merely to make a demonstration look smaller. Identify the requirement it will validate, who will measure it and what result counts as a pass.
Transfer the Circuit, Not Just the Schematic
Port the manufacturer’s design intent along with the component connections. A schematic does not capture every layout, grounding, thermal or measurement assumption.
The Analog Devices MAX8660/MAX8661 layout guide explains why its evaluation layout favors accessible components and identifies critical placement and current paths. It also discusses an area tradeoff when avoiding its example microvias. The lesson is to understand why a reference uses a feature before removing or copying it, not to apply that device’s geometry to every circuit.
- Collect the exact source revision. Obtain the device data sheet, evaluation guide, schematic, bill of materials and available layout files. Check errata and applicable reuse terms.
- Mark what changes. Compare supply rails, load, clock, connectors, protection, component substitutions and board stackup. Give each change a reason.
- Preserve critical implementation requirements. Review decoupling placement, return paths, switching loops, exposed-pad connection and interface routing using the relevant device guidance.
- Keep bring-up access. Provide a way to program, reset, measure rails and inspect the important signals. Removing every header can make the first board difficult to diagnose.
- Turn changes into tests. A changed supply needs a power-up and load review; a new connector or cable needs interface checks; a smaller enclosure needs thermal evaluation.
Manufacturer evaluation documentation can be a useful starting package. For example, the ADP5134 evaluation user guide includes setup, schematics and layout information. Treat such files as device-specific engineering references, not a complete production handoff for a different product.
If the first custom board behaves differently, reproduce the evaluation setup before changing components at random. Compare one changed condition at a time and retain the known-good kit as a reference.
Compare Development Cost and Unit Cost Separately
A lower custom-board unit price does not automatically repay its development cost. Compare eligible production alternatives, not a development-only kit against a finished product.
A useful planning calculation is break-even quantity = additional fixed development cost ÷ per-unit saving, provided the saving is positive and both options meet the same requirements. Include schematic/layout work, prototypes, fixtures, programming setup and required validation in fixed cost. Include components, fabrication, assembly, test, handling and expected normal production losses in unit cost using actual estimates.
Hypothetical example: a production-module solution costs $45 per assembled unit, while a qualified custom alternative is estimated at $29. Additional development and validation cost is $8,000. The simple break-even quantity is $8,000 ÷ ($45 − $29) = 500 units. These are illustrative inputs, not QFPCB prices. At 100 units, the $1,600 nominal unit-cost saving does not cover $8,000; at 1,000 units, the nominal $16,000 saving may do so, before differences in maintenance, schedule and supply risk.
Keep uncertain assumptions visible. A quote for an untested layout may change after DFM review or component availability checks. A production module may reduce development scope without being the lowest unit-cost option. Schedule can matter, but do not turn an unmeasured delay risk into a fabricated financial certainty.
A Go/No-Go Checklist for the First Custom Build

Start the first custom build when its requirements are stable enough to learn something useful and its unresolved risks have explicit tests. It need not already be a fully qualified product.
| Gate | Evidence to save | Hold condition |
|---|---|---|
| Feasibility | Evaluation results with setup and firmware revisions | The core device choice is still unsupported |
| Design inputs | Power, interfaces, outline, environment and performance limits | Major constraints are contradictory or missing |
| Implementation review | Schematic/layout review and change-versus-reference list | A critical circuit is copied without understanding its requirements |
| Manufacturing | Fabrication files, BOM, placement data and DFM responses | Files disagree or essential parts cannot be sourced as specified |
| Bring-up | Programming method, test points, safe power-up plan and pass limits | No practical way to identify a failed rail or interface |
| Production transition | Remaining qualification and acceptance plan | A successful prototype is being treated as completed qualification |
For a PCB design review, send the evaluation-board reference, product requirements and change list. For prototype assembly, add the approved fabrication package, BOM, placement file, firmware and test instructions. Use QFPCB’s contact page to request a scoped review and quote, stating whether you need feasibility hardware, an engineering prototype or a production-ready build. Those are different deliverables.
FAQ
Is an evaluation board the same as a reference design?
No. An evaluation board is hardware for testing a device or function. A reference design may include circuit files and performance evidence for an application. Their contents and intended uses differ; inspect the exact documentation rather than relying on the label.
Can I copy an evaluation board’s Gerber files directly?
First check the files’ revision, permitted use and suitability. Gerbers alone do not establish your BOM, firmware, mechanical fit or acceptance tests. Even an unchanged layout needs review against the product’s requirements.
Must my custom board have the same layer count?
Not always, but a change can affect references, routing geometry and thermal behavior. Review the device requirements and the fabricator’s construction before changing it. Fewer layers are not automatically an equivalent implementation.
Why does the evaluation board have so many jumpers?
They often expose configuration and measurement options useful during evaluation. Remove an option only after defining its production setting and checking how programming, test or recovery will work without it.
Should I remove the debugger from the first prototype?
You may omit an onboard debugger if another reliable programming/debug route remains. Confirm voltage compatibility, connector access and reset behavior before the board is built. Saving space should not eliminate essential bring-up access.
Does using a module eliminate certification work?
No blanket conclusion is safe. Confirm the module’s documentation, integration conditions and the finished product’s applicable requirements with the responsible compliance specialist. A module’s evidence is not automatically evidence for every host design.
How many prototypes should I order?
Choose quantity from the test plan: engineering bring-up, firmware work, mechanical checks and any destructive or environmental tests. Include realistic spares. There is no universal number that establishes design readiness.
What should I retain after switching to a custom PCB?
Keep a known-good evaluation unit, its firmware and setup record, the source documents and your change list. They provide a useful comparison when a later prototype behaves differently.